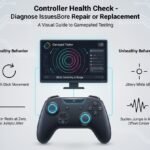
Buying a used controller can save you a lot of money. But it can also turn into a headache if you do not test it properly. I learned this the hard way after buying a cheap controller that looked perfect, but had stick drift so bad I could not aim straight in any game.
This guide on How to Test a Controller Before Buying Used Complete Buyer Checklist is written to help real people avoid those mistakes. No fluff. No tech jargon. Just clear steps you can follow, whether you are buying from a friend, Facebook Marketplace, a local shop, or someone you meet in a parking lot.
I will share personal tips, real examples, and advice from repair techs and gamers who deal with controllers every day.
Why Testing a Used Controller Matters More Than You Think
Controllers wear out faster than consoles. Buttons get mashed. Sticks loosen. Triggers lose pressure. And most of these problems are not visible at first glance.
A used controller can look clean, but still have issues like:
- Stick drift ruins aiming
- Buttons that only work when pressed hard
- Triggers that do not register fully
- Wireless connection problems
- A battery that drains too fast
Testing properly helps you avoid paying for someone else’s problem.
Before You Meet the Seller, Do This First
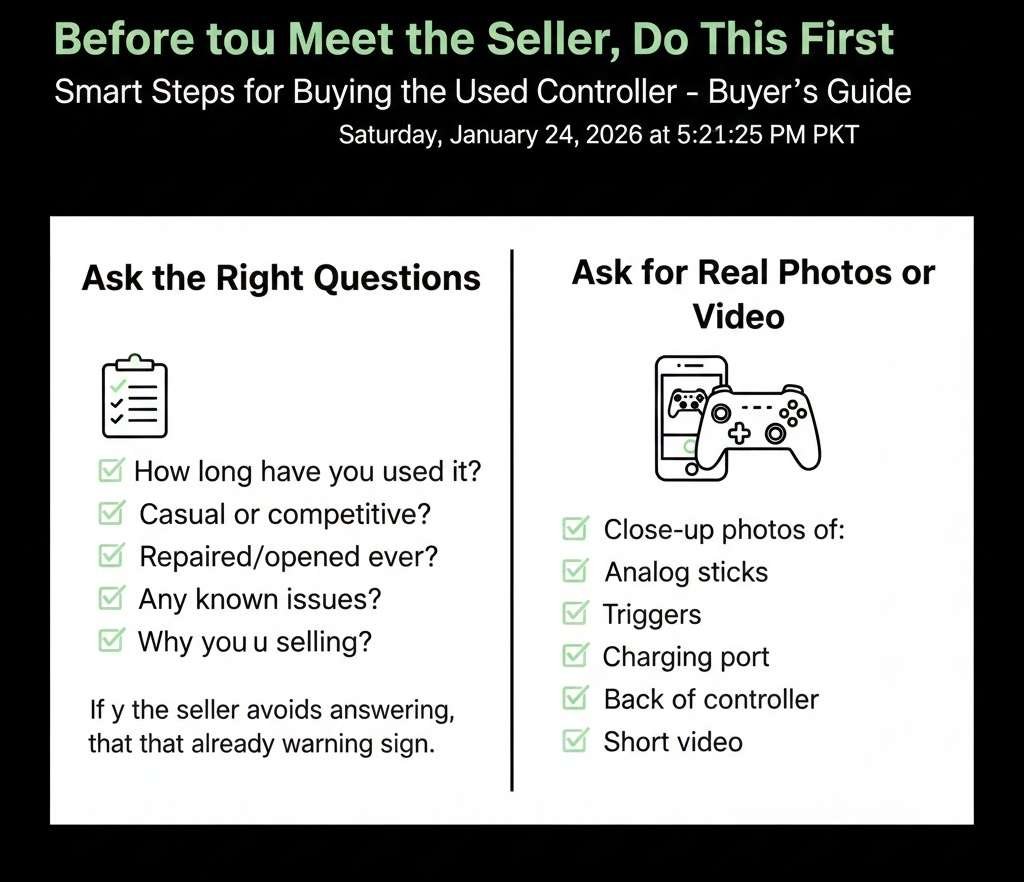
Before we go into the hands-on checklist, there are a few things you should do even before meeting the seller.
Ask the Right Questions
These questions tell you a lot before you even see the controller.
- How long have you used the controller
- Was it used mainly for casual play or competitive gaming
- Has it ever been repaired or opened
- Are there any known issues, even small ones
- Why are you selling it
If a seller avoids answering or gives very short, vague replies, that is already a warning sign.
Ask for Real Photos or Video
Ask for close-up photos of:
- Analog sticks
- Buttons
- Triggers
- Charging port
- Back of the controller
Ask for a short video showing the controller turning on and navigating a menu. Honest sellers usually do not mind.
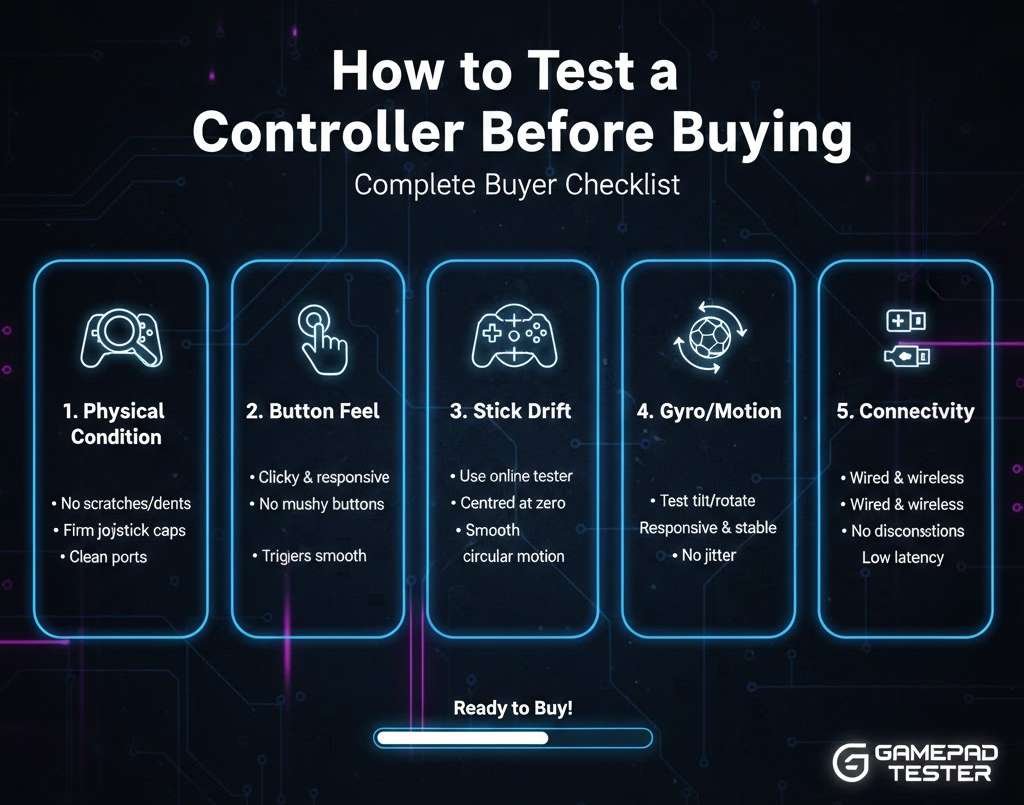
How to Test a Controller Before Buying: Complete Buyer Checklist, Step by Step
This is the core of the guide. Save it. Screenshot it. Use it every time.
Visual Inspection Checklist
Before you even turn the controller on, look closely.
Check the Overall Condition
Hold the controller in your hands and look for:
- Cracks in the plastic
- Gaps between parts
- Loose faceplate
- Uneven seams
Small scratches are normal. Structural damage is not.
Inspect the Analog Sticks
This is where many problems hide.
- Are the sticks centered or leaning
- Do the rubber caps feel worn smooth
- Do they wobble more than expected
A repair tech once told me that a heavy wobble almost always means future drift, even if it works fine today.
Look at Buttons and Triggers
Check for:
- Buttons that sit lower than others
- Sticky or shiny residue
- Triggers that do not return quickly
Sticky buttons often mean spills or heavy use.
Check the Charging Port
Look inside the charging port.
- Is it loose
- Does the cable wiggle a lot
- Is there visible damage
A loose port can mean charging problems later.
Power and Connection Test
Now it is time to turn it on.
Wired Connection Test
Test with a cable first.
- Plug it into a console or PC
- Make sure it turns on right away
- Wiggle the cable gently to see if it disconnects
If the controller keeps disconnecting, walk away.
Wireless Connection Test
For wireless controllers:
- Pair it with the console
- Move a few feet away
- Check for input lag or disconnects
Connection issues often show up within the first minute.
How to Test a Controller Before Buying: Complete Buyer Checklist for Analog Sticks
Analog sticks are the number one failure point. Spend extra time here.
Basic Movement Test
In a menu or game:
- Slowly move the stick in a full circle
- Watch for sudden jumps or dead zones
- Let go and see if it returns to the center
If the cursor moves when you are not touching the stick, that is drift.
Precision Test
Open a game with aiming or camera control.
- Make small movements
- Try to aim at a fixed point
- See if the movement feels smooth
Competitive players often sell controllers right when stick drift starts. Be careful.
Press Down Stick Click Test
Press the stick down if it has a click function.
- Does it register every time
- Does it feel mushy or uneven
A broken stick click can ruin many games.
Button Testing Made Simple
Every button matters, even the ones you rarely use.
Face Buttons Test
Press each button one by one.
- Does it register instantly
- Does it feel consistent
- Does it get stuck
Try pressing quickly and slowly.
D Pad Test
Use the D pad in menus.
- Test all directions
- Test diagonal presses if possible
- Make sure no direction sticks
D-pad issues are common on older controllers.
Shoulder Buttons and Triggers
This is often overlooked.
- Press the shoulder buttons repeatedly
- Hold triggers halfway if they are analog
- Check if triggers register the full range
In racing games, bad triggers are a deal breaker.
How to Test a Controller Before Buying: Complete Buyer Checklist for Vibration and Sensors
These features matter more than people think.
Vibration Test
If the controller supports vibration:
- Turn it on in settings
- Trigger vibration
- Listen for rattling or uneven buzzing
Loud rattling can mean loose internal parts.
Motion and Gyro Test
For controllers with motion controls:
- Tilt the controller
- See if movement registers correctly
- Test in a supported game if possible
Motion sensor issues are rare but annoying.
Battery Health Test
Battery problems are silent killers.
Check Battery Life Quickly
You cannot fully test battery life in one meeting, but you can spot red flags.
- Check battery percentage
- See if it drops fast during testing
- Ask how long it lasts on a full charge
If a seller says it needs charging every hour, believe them.
Charging Test
Plug it in.
- Does the charging light turn on
- Does it flicker
- Does it stop charging when moved
Bad batteries mean extra cost later.
Sound and Headphone Jack Test
If the controller has a headphone jack:
- Plug in headphones
- Play sound
- Wiggle the plug slightly
A crackling sound means a worn jack.
How to Test a Controller Before Buying: Complete Buyer Checklist Using a PC
If a console is not available, a PC works great.
Use Built-In Test Tools
On most PCs:
- Connect the controller
- Open controller settings
- Use the test screen
You can see stick movement and button presses clearly.
Online Controller Test Sites
Some websites show live input.
- Check for drift
- Check the full trigger range
- Check all buttons
This is one of the most reliable ways to test fast.
Common Controller Problems and What They Really Mean

Here is a simple table to help you decide.
| Problem | What It Means | Buy or Walk Away |
|---|---|---|
| Minor cosmetic wear | Normal use | Buy |
| Slight stick wobble | Early wear | Only if cheap |
| Stick drift | Internal wear | Walk away |
| Sticky buttons | Possible spill | Walk away |
| Loose charging port | Future failure | Walk away |
| Weak battery | Replacement needed | Only if cheap |
Real Story From a Game Repair Technician
I once spoke with a local console repair technician who sees dozens of controllers every week. He said most people sell controllers right when they start acting up, but before they completely fail.
His advice was simple.
If a used controller feels anything less than perfect during testing, it will only get worse.
That stuck with me.
How Much Should You Actually Pay for a Used Controller
Price matters.
As a rough guide:
- Like new condition should be 60 to 70 percent of the new price
- Light wear should be 50 percent
- Any issues should drop it to 30 percent or less
If the price is too close to new, buy new.
How to Test a Controller Before Buying: Complete Buyer Checklist for Online Purchases
If you cannot test in person:
Buy From Platforms With Returns
Always choose sellers with:
- Return policy
- Buyer protection
- Clear condition descriptions
Test Immediately After Delivery
The moment it arrives:
- Test everything in this checklist
- Record video if issues appear
- Report problems fast
Do not wait.
Final Quick Checklist You Can Save
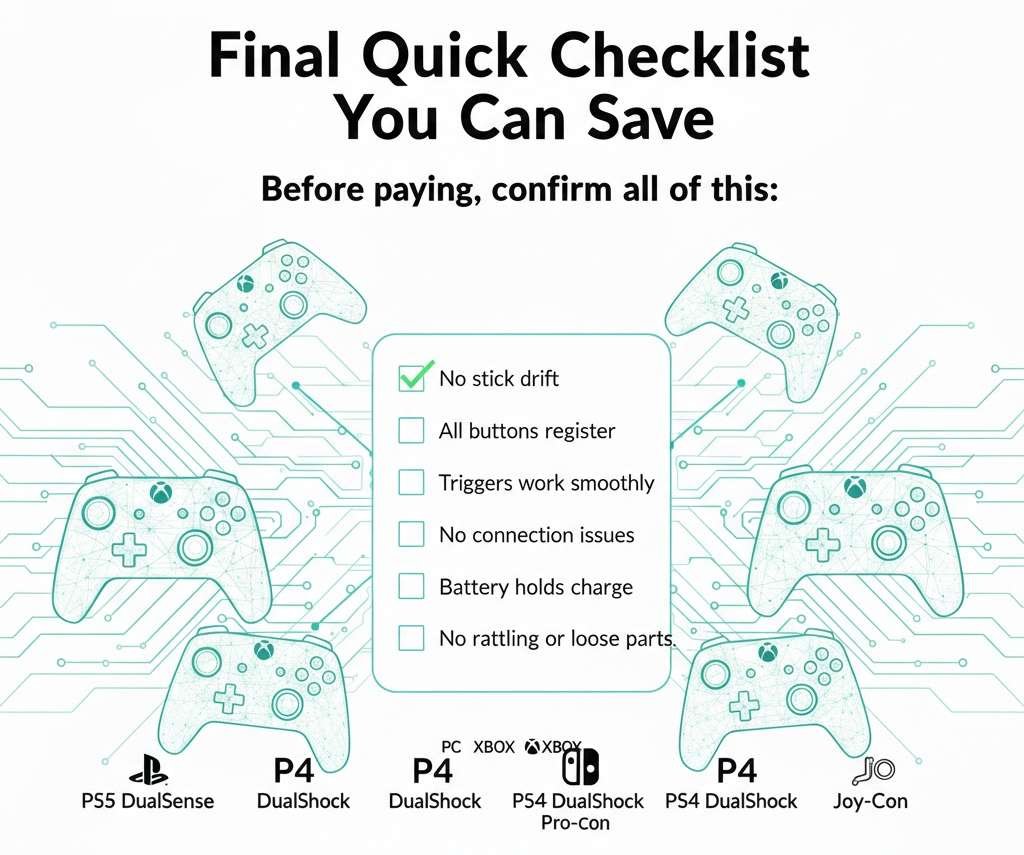
Before paying, confirm all of this:
- No stick drift
- All buttons register
- Triggers work smoothly
- No connection issues
- Battery holds charge
- No rattling or loose parts
If even one major item fails, walk away.
Final Thoughts
Buying a used controller is one of those things that can either feel like a smart deal… or a complete waste of money. The difference usually comes down to how well you test it. Most problems are not visible at a glance, and sellers rarely mention small issues that can ruin your gaming later.
If you follow this checklist, you will avoid 90% of the common mistakes buyers make. You will know exactly what to look for, how to test it, and when to walk away. No guessing, no awkward bargaining, and no surprises when you get home.
At the end of the day, remember this rule:
If a used controller does not feel right during testing, it will feel even worse during gameplay.
Be patient, take your time, and do not let a “good price” blind you. A great deal is only great if the controller actually works.