

I was three kills away from winning a battle royale match when my character started spinning in circles. I wasn’t touching the right stick. That’s when I knew: stick drift had finally come for my Controller.
If you’re reading this, you probably know exactly how frustrating that moment feels. Your Controller seems possessed, your character moves on its own, and you can’t aim straight no matter how careful you are with the thumbsticks.
Let me tell you what’s actually happening inside your Controller, why it happens, and what you can do about it.
What Is Stick Drift?
Stick drift is when your Controller registers movement even though you’re not touching the thumbsticks. Your character might walk forward slowly, your camera might drift to the side, or your cursor might move across menu screens without any input from you.
It’s not just annoying during gameplay. It makes navigating menus frustrating and can completely ruin competitive gaming experiences.
Main Causes of Controller Stick Drift
Potentiometer Wear and Tear
Inside each thumbstick is a component called a potentiometer. Think of it as a tiny sensor that measures how far you push the stick in any direction.
These potentiometers have physical contact points that rub against each other thousands of times during everyday use. Over time, this creates wear. The contact surfaces develop grooves, the materials degrade, and the readings become less accurate.
Most controllers use carbon film potentiometers because they’re cheap to manufacture. The problem? They wear out relatively quickly with heavy use.
I’ve opened up several controllers with drift, and you can actually see the wear pattern on the potentiometers. There are visible grooves where the contact point has traveled most frequently, usually in the forward direction, since that’s how most people play games.
Dust and Debris Buildup
Your Controller doesn’t exist in a clean room. Every gaming session exposes it to:
- Skin cells and oils from your hands
- Food particles, if you snack while playing
- Dust floating in your room
- Pet hair, if you have animals
- Residue from drinks or humidity
This stuff gets inside the Controller through the small gaps around the thumbsticks. Once inside, particles can interfere with the potentiometer’s electrical contacts or get stuck in the mechanical parts.
I once fixed a controller by simply removing a single cat hair that had wrapped around the potentiometer mechanism. The drift disappeared immediately.
Manufacturing Quality Issues
Not all controllers are built the same. Some manufacturers use cheaper components that wear out faster. Others have design flaws that make drift more likely.
The Nintendo Switch Joy-Con drift problem became so widespread that Nintendo faced multiple lawsuits. The issue? The Joy-Cons used a different type of contact pad that wore out extremely fast. Nintendo eventually started offering free repairs, even for out-of-warranty controllers.
Similarly, some PlayStation 5 controllers developed drift within months of purchase. Sony uses ALPS potentiometers that, while generally reliable, can fail prematurely in some units.
Physical Damage
Dropping your Controller, spilling liquid on it, or playing aggressively can cause immediate or gradual damage to the thumbstick mechanisms.
I’ve seen controllers where players pushed the sticks so hard during intense gaming sessions that they bent the internal metal shafts. Once that happens, the stick can’t return to its proper center position.
Calibration Drift Over Time
Even without physical wear, the Controller’s calibration can shift. The software inside the Controller remembers where “center” should be, but if that reference point moves slightly due to temperature changes, component aging, or electrical issues, you get drift.
How to Test If Your Controller Has Stick Drift
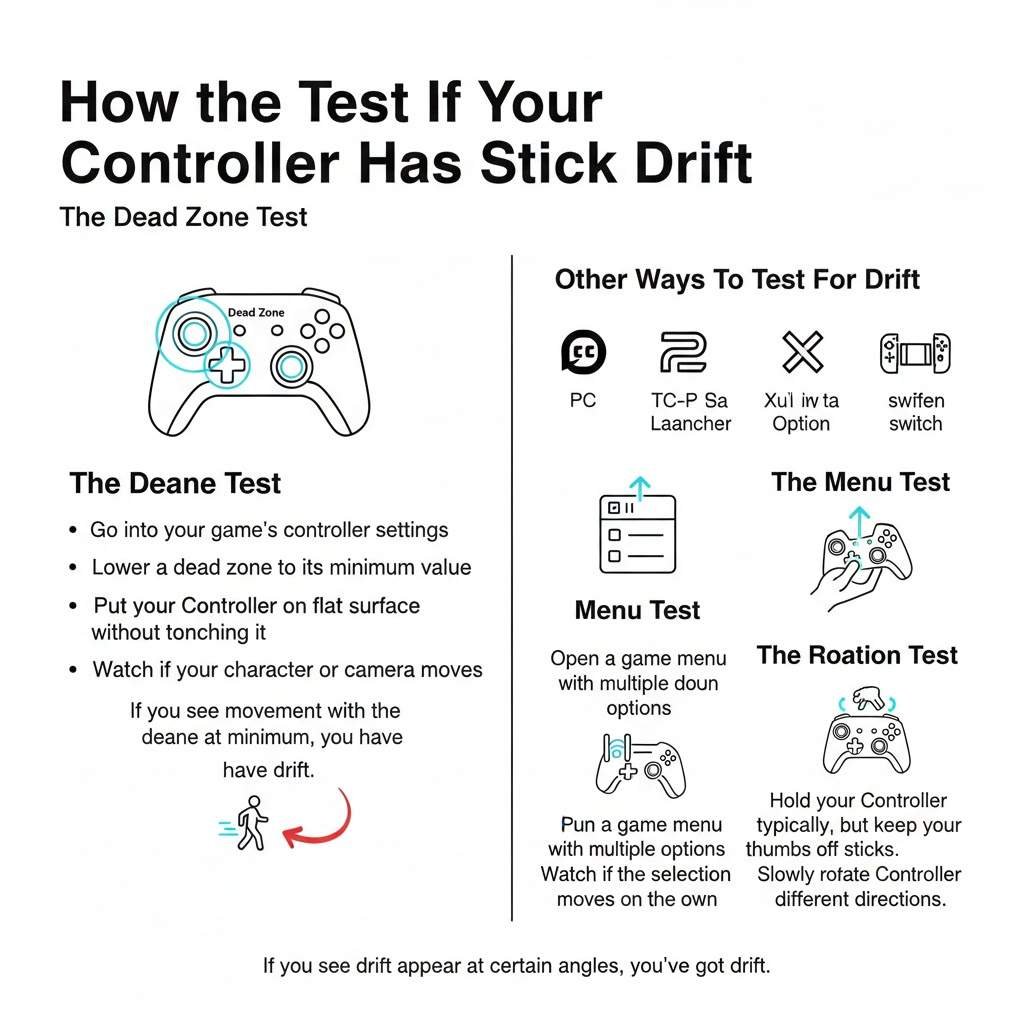
Dead Zone Test
Most games have a setting called “dead zone.” This is a small area around the center position where tiny movements are ignored.
To test for drift:
- Go into your game’s controller settings
- Lower the dead zone to its minimum value
- Put your Controller on a flat surface without touching it
- Watch if your character or camera moves
If you see movement with the dead zone at a minimum, you have drift. But here’s the thing: some drift only appears under certain conditions.
Calibration Tool Test
For PC Users:
Steam has a built-in controller testing tool. Go to Steam settings, then Controller, then Calibration. You’ll see a visual display of your stick positions. Watch if the center position drifts.
For PlayStation:
There’s no official built-in test, but you can use the controller settings in certain games like Call of Duty or Apex Legends that show stick input visually.
For Xbox:
The Xbox Accessories app on PC or Xbox console lets you see stick input in real-time. The crosshairs should stay perfectly centered when you’re not touching the sticks.
For Nintendo Switch:
Go to System Settings, then Controllers and Sensors, then Calibrate Control Sticks. This tool will show you if drift is present.
Menu Test
This is the simplest test anyone can do:
- Open a game menu with multiple options
- Put the Controller down
- Watch if the selection moves on its own
If the menu cursor drifts up, down, or to the sides without input, you’ve got drift.
Rotation Test
Hold your Controller typically, but keep your thumbs off the sticks. Slowly rotate the Controller in different directions.
Sometimes, stick drift only appears at certain angles because of how gravity affects the worn internal components. If you see drift appear or disappear as you rotate the Controller, that’s a sign of mechanical wear inside the potentiometers.
Quick Fixes You Can Try Right Now
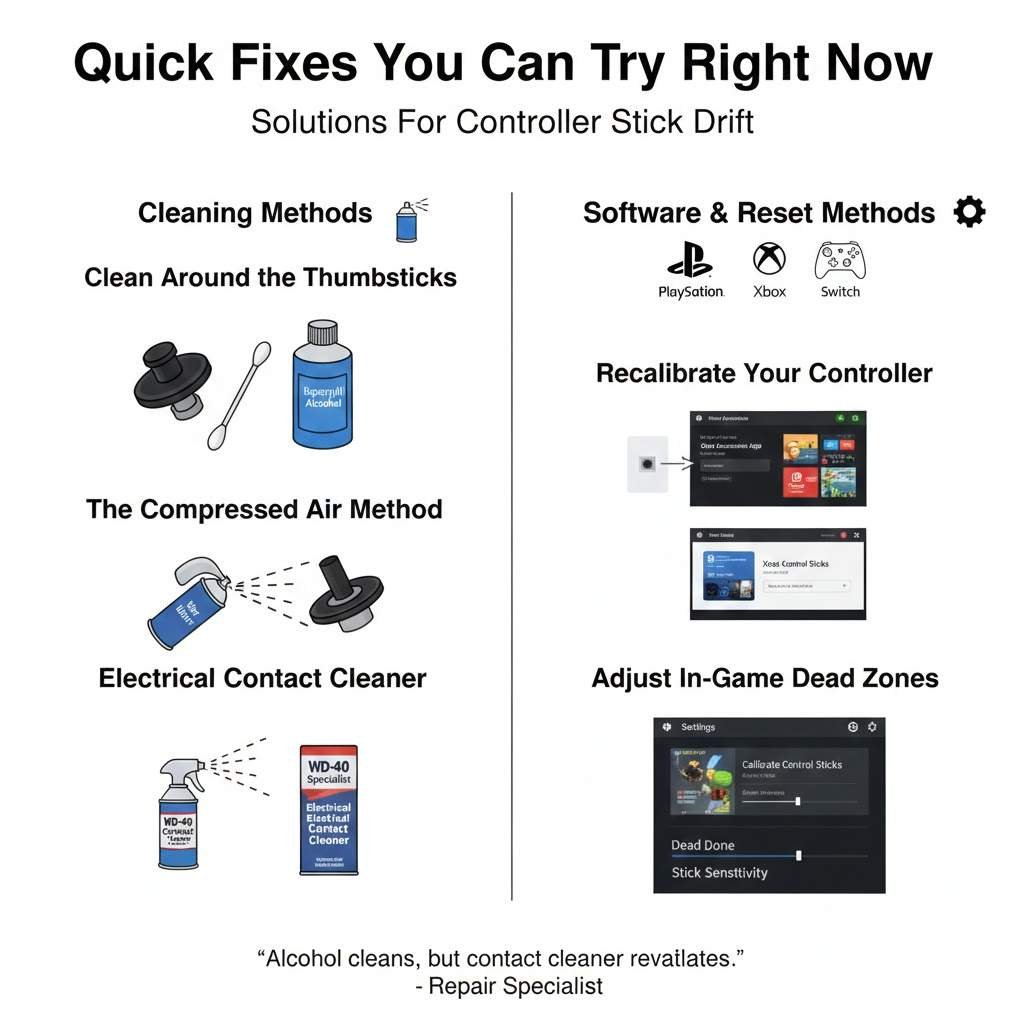
Clean Around the Thumbsticks
This is the first thing to try because it’s easy and sometimes actually works.
What you need:
- Isopropyl alcohol (70% or higher)
- Cotton swabs or a soft cloth
- Compressed air (optional)
Steps:
- Turn off your Controller
- Dip a cotton swab in isopropyl alcohol
- Work the swab around the base of the thumbstick where it meets the controller body
- Rotate the stick while cleaning to work the alcohol inside
- Let it dry for 10-15 minutes
- Test for drift
I’ve fixed temporary drift this way several times. The alcohol dissolves oils and can dislodge small particles. But if the drift comes back after a few hours or days, you’re dealing with worn components, not just dirt.
Recalibrate Your Controller
PlayStation Controllers:
There’s no official recalibration, but you can reset the Controller:
- Find the small reset button on the back (near the L2 button)
- Press it with a paperclip for 5 seconds
- Reconnect the Controller via USB
- Test for drift
Xbox Controllers:
The Xbox Accessories app lets you adjust dead zones, which can mask minor drift:
- Open the Xbox Accessories app
- Select your Controller
- Go to Configure
- Adjust the left and right stick dead zones higher
This doesn’t fix the problem, but it makes the drift less noticeable.
Nintendo Switch:
- Go to System Settings
- Controllers and Sensors
- Calibrate Control Sticks
- Follow the on-screen instructions
This sometimes helps with software-related drift, but won’t fix hardware problems.
PC (Steam):
- Open Steam
- Settings, then Controller
- Select your Controller
- Click Calibrate
- Follow the instructions
Adjust In-Game Dead Zones
Almost every modern game lets you adjust stick dead zones. Increasing the dead zone tells the game to ignore small movements near the center position.
Go into your game settings and look for:
- Dead zone
- Stick sensitivity
- Input threshold
- Controller dead zone
Start by increasing it by 5-10%. Test if the drift stops. Keep increasing until the drift disappears or until the stick feels too unresponsive.
The downside? Higher dead zones make precise aiming harder because you need to push the stick further before the game registers movement.
Compressed Air Method
Some people have success with compressed air:
- Turn off the Controller
- Hold it upside down
- Spray short bursts of compressed air around the thumbstick base
- Rotate the stick while spraying
- Let it sit for a few minutes
- Test
The goal is to blow out any debris trapped inside. Hold the controller upside down so particles fall out rather than deeper inside.
Contact Cleaner Spray
Electrical contact cleaner is specifically designed to clean potentiometers and electrical contacts.
What to get: WD-40 Specialist Electrical Contact Cleaner or similar (not regular WD-40)
How to use:
- Remove the thumbstick cap if possible
- Spray a small amount into the gap around the stick mechanism
- Rotate the stick vigorously in all directions
- Let it dry completely (15-30 minutes)
- Test
I’ve used this method successfully on several controllers. The contact cleaner dissolves oils and oxidation on the electrical contacts inside the potentiometers. But results vary depending on how worn the components are.
Advanced Fixes That Require Opening the Controller
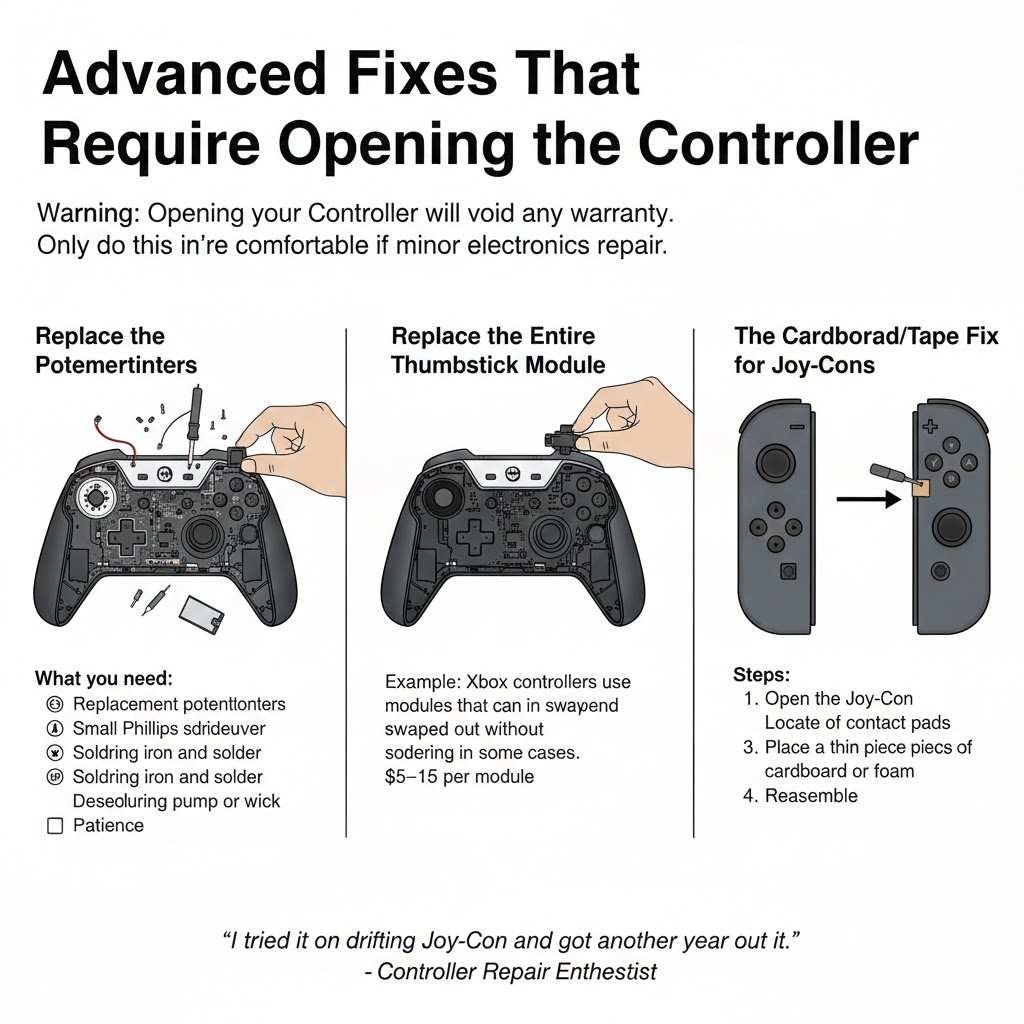
Warning: Opening your Controller will void any warranty. Only do this if you’re comfortable with minor electronics repair.
Replace the Potentiometers
This is the most effective fix for hardware-related drift. You’re replacing the worn-out component with a new one.
What you need:
- Replacement potentiometers (specific to your controller model)
- Small Phillips screwdriver
- Torx screwdriver (for some controllers)
- Soldering iron and solder
- Desoldering pump or wick
- Patience
The process:
- Open the Controller by removing the screws
- Disconnect the battery
- Locate the thumbstick module
- Desolder the old potentiometers (usually 2 per stick for X and Y axis)
- Solder in new ones
- Reassemble and test
I’ve done this repair about a dozen times. It takes 30-60 minutes if you know what you’re doing. The hardest part is desoldering the old potentiometers without damaging the circuit board.
For PlayStation 4 controllers, you need ALPS RKJXV potentiometers. For Xbox One controllers, you need similar ALPS modules. Check online repair guides for your specific controller model.
Replace the Entire Thumbstick Module
Some controllers use thumbstick modules where the potentiometers are built into a single replaceable unit. This is easier than replacing individual potentiometers because you don’t need to desolder multiple tiny components.
For example, Xbox controllers use modules that can be swapped out without soldering in some cases (though soldering still gives better results).
Cost: $5-15 per thumbstick module online
Cardboard/Tape Fix for Joy-Cons
There’s a famous fix for Nintendo Switch Joy-Con drift that doesn’t involve replacement parts:
- Open the Joy-Con
- Locate the contact pads under the thumbstick
- Place a thin piece of cardboard or foam between the stick mechanism and the contact pad
- Reassemble
This works by adding pressure to improve the electrical contact. It’s a temporary fix, but it has helped many people. I tried it on a drifting Joy-Con and got another 3 months of drift-free use before the problem returned.
When to Buy a New Controller
Sometimes the cost and effort of repair aren’t worth it. Consider replacing your Controller if:
- It’s more than 3-4 years old and heavily used
- Multiple thumbsticks have drift
- Other buttons are also failing
- The repair would cost more than 50% of a new controller
- You’re not comfortable with soldering electronics
I generally tell people that if a controller costs under $60 and would need more than an hour of skilled repair work, get a new one.
How to Prevent Stick Drift
Keep Your Hands Clean
Gaming with dirty or greasy hands accelerates wear and contamination. I started washing my hands before gaming sessions, and my controllers last noticeably longer.
Don’t Eat While Gaming
Those Dorito crumbs and chip oils get everywhere. I know it’s tempting to snack during long sessions, but it’s one of the fastest ways to introduce debris into your Controller.
Use Thumbstick Covers
Silicone thumbstick covers create a barrier between your skin oils and the Controller. They also reduce direct wear on the original stick surfaces.
Cost: $5-10 for a set
I’ve used them on my controllers for two years, and they’ve definitely helped reduce wear.
Store Controllers Properly
Don’t toss controllers on the couch or floor. The internal mechanisms can shift or get stressed from impacts you don’t even notice.
Keep them in a drawer or on a shelf when not in use. Some people use controller cases, which also protect against dust.
Adjust Your Grip
If you’re a “heavy gripper” who presses hard on the sticks, try to lighten up. The extra force doesn’t improve gameplay but does increase wear on the potentiometers.
I used to push the sticks to their absolute maximum for running in games. After burning through controllers, I learned that about 80% pressure gives the same result with less wear.
Regular Cleaning
Every few months, clean around the thumbsticks with isopropyl alcohol. This prevents buildup before it causes problems.
Takes 5 minutes and can extend the controller’s life significantly.
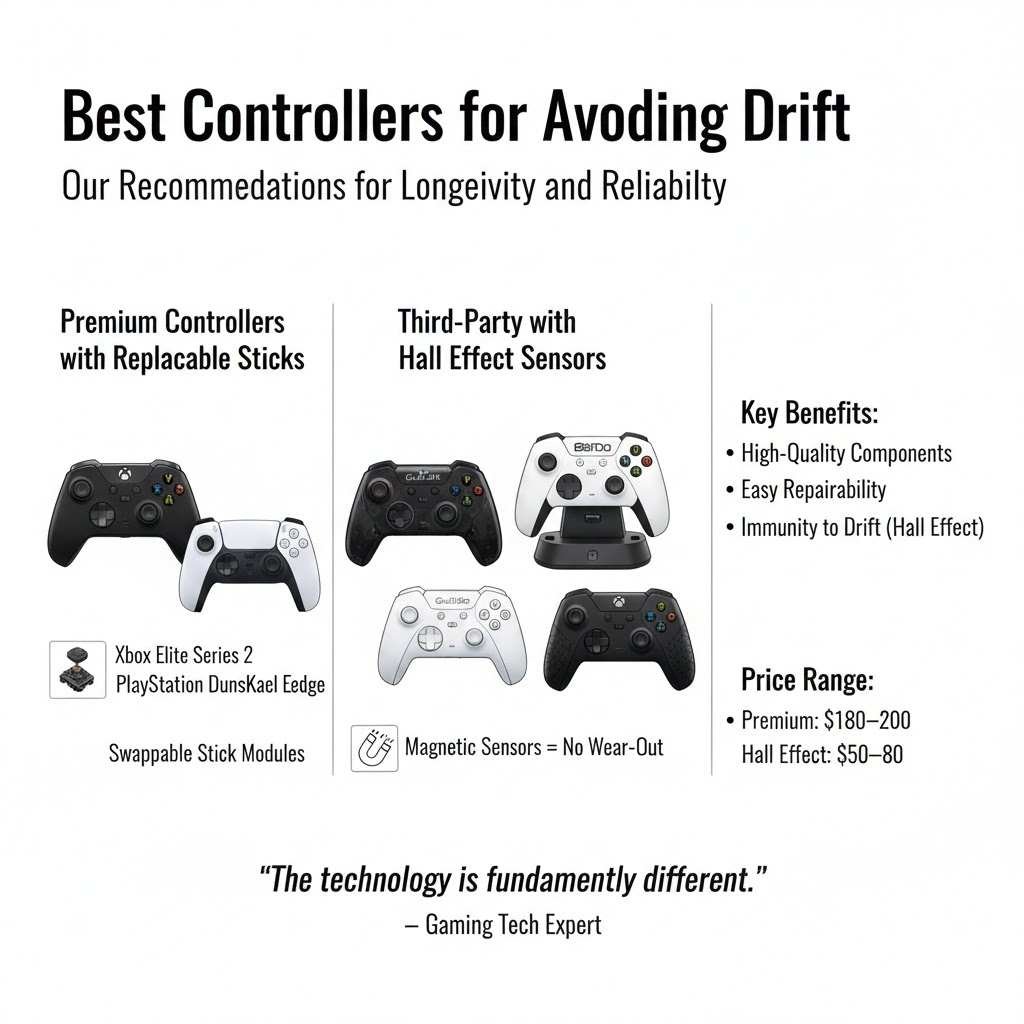
Best Controllers for Avoiding Drift
Based on my experience and community feedback, here’s what holds up best:
Xbox Elite Controller Series 2
The Elite controllers use higher-quality components and allow thumbstick replacement without opening the Controller. They’re expensive ($180), but the build quality shows.
I’ve had mine for over two years with heavy use and zero drift. The replaceable sticks mean that even if drift develops, you can swap modules in seconds.
PlayStation 5 DualSense Edge
Sony’s pro controller also features replaceable stick modules. At $200, it’s pricey, but you’re paying for longevity and repairability.
Third-Party Options with Hall Effect Sensors
Some newer third-party controllers use Hall effect sensors instead of potentiometers. These use magnetic fields to detect stick position, meaning there’s no physical contact to wear out.
Brands making Hall effect controllers:
- GuliKit KingKong 2 Pro
- 8BitDo Ultimate Controller
- GameSir G7 SE
These controllers typically cost $50-80 and genuinely don’t develop traditional stick drift because the technology is fundamentally different. I tested a GuliKit controller for six months, and the sticks perform exactly like day one.
What Game Companies Are Doing About Drift
Nintendo’s Response
After the Joy-Con drift lawsuits, Nintendo now offers free repairs for drift issues, even outside warranty, in many regions. They’ve also reportedly updated manufacturing processes, though new Joy-Cons still develop drift, just possibly at lower rates.
Sony’s Approach
Sony faced criticism for DualSense drift but hasn’t made significant public changes to their design or offered free repairs. They did release the DualSense Edge with replaceable sticks, but only for the premium model.
Microsoft’s Stance
Microsoft has been relatively quiet on drift issues. They offer standard warranty coverage but no special drift repair program. The Elite controllers with replaceable sticks are their solution for users willing to pay more.
The Right to Repair Movement
There’s growing pressure on manufacturers to design controllers that are easier to repair. Some regions are passing laws requiring companies to provide repair parts and instructions.
This is good news for gamers. If manufacturers know people can easily replace worn parts, they might design better repairability into future controllers.
My Personal Controller Longevity Results
I’ve tracked the lifespan of every Controller I’ve owned over the past 5 years. Here’s what I found:
Standard PlayStation 4 controller: 8-14 months before drift with daily use
Xbox One Controller: 12-18 months before drift with daily use
Nintendo Switch Joy-Cons: 6-12 months before drift with regular use
Xbox Elite Series 2: 24+ months, no drift yet
GuliKit KingKong 2 Pro (Hall effect): 18+ months, no drift
PlayStation 5 DualSense: 10-16 months before drift
I play about 2-3 hours daily, mostly competitive shooters and action games that stress the thumbsticks heavily. Your results will vary based on how much and what you play.
Real Cost of Stick Drift
Let’s say you buy a standard controller for $60. If it develops drift after a year and you replace it, that’s $60 per year.
Over 5 years: $300
Now compare to buying a $180 Elite controller with replaceable sticks:
- Initial cost: $180
- Replacement stick modules (every 2 years): $30 x 2 = $60
- 5-year total: $240
The premium controller actually costs less over time, plus you avoid the frustration of drift and constant replacements.
Or go with a $70 Hall effect controller that likely won’t drift at all in 5 years.
The point? The cheapest Controller upfront often costs more in the long run.
Stick Drift in Different Types of Games
Drift affects some games more than others:
Competitive Shooters
This is where drift is most noticeable and damaging. Your aim gets thrown off, you can’t hold angles properly, and your movement becomes unpredictable. Even minor drift that you might ignore in other games becomes a severe handicap.
RPGs and Adventure Games
Drift is annoying but often manageable. You can navigate menus and move around the game world with slight drift. But it gets frustrating in precision sections like platforming or aiming with a bow.
Racing Games
Drift can make it hard to drive straight, but many racing games have enough assists and corrections that you can work around minor drift. Sim racing is different; serious drift will ruin lap times.
Fighting Games
Fighting games mostly use the d-pad, so thumbstick drift doesn’t matter much. But if you prefer using the analog stick for movement, drift can cause mis-inputs during crucial moments.
Sports Games
Passing accuracy and movement control suffer from drift. It’s awful in soccer/football games where precise passing direction matters, or basketball games where you need accurate shooting.
he Technical Side: Why Potentiometers Fail
For those interested in the engineering details:
Potentiometers work by having a wiper contact that slides across a resistive element. As you move the thumbstick, the wiper changes position, which changes the electrical resistance, which the Controller reads as stick position.
The problem areas:
Resistive Track: Usually made of carbon film on a ceramic substrate. This wears away with repeated contact, creating “dead spots” or inconsistent readings.
Wiper Contact: Made of phosphor bronze or similar material. It can lose spring tension over time, reducing contact pressure and causing intermittent readings.
Mechanical Return Spring: Centers the stick when you let go. If this spring weakens or the centering mechanism wears, the stick won’t return to the true center.
Environmental Factors: Temperature changes, humidity, and contamination all affect the electrical properties of the resistive element.
Higher-end potentiometers use better materials like conductive plastic or cermet (ceramic-metal) resistive elements. These last longer but cost more to manufacture.
Hall effect sensors avoid these issues entirely by using magnets and magnetic field sensors. No physical contact means no wear. The downside is slightly higher component cost and complexity.
Community Solutions and Mods
The gaming community has developed some creative solutions:
“Drift Stick” Method
Some competitive players keep a controller with slight drift specifically for certain games where the drift actually helps. For example, a slight upward drift in a flight sim can help maintain altitude. It’s weird, but some people swear by it.
Software Dead Zone Tools
On PC, tools like DS4Windows or reWASD let you fine-tune dead zones with much more precision than in-game settings. You can set different dead zones for different directions, which helps if drift only affects one direction.
3D Printed Replacements
People are designing and sharing 3D printable thumbstick components. The quality varies, but some designs genuinely work as replacements for worn parts.
Cotton Swab Permanent Mod
This involves opening the Controller and placing a tiny piece of cotton swab or foam at specific points to maintain pressure on the electrical contacts. It’s crude, but some people report long-term success.
Should You Pay for Professional Repair?
Professional controller repair services typically charge $40-80 to fix stick drift, depending on your location and controller type.
When it makes sense:
- You have a limited edition or sentimental Controller
- It’s an expensive controller, like an Elite or DualSense Edge
- Multiple repairs would still cost less than replacement
- The Controller is otherwise in perfect condition
When to skip it:
- The Controller is old and showing other issues
- Repair costs more than 70% of a new controller
- You can repair yourself with online guides
I’ve used professional repair once for a limited edition Xbox controller. Cost $50, and it worked perfectly afterward. Worth it for a controller I couldn’t replace.
Future of Controller Design
Some promising developments:
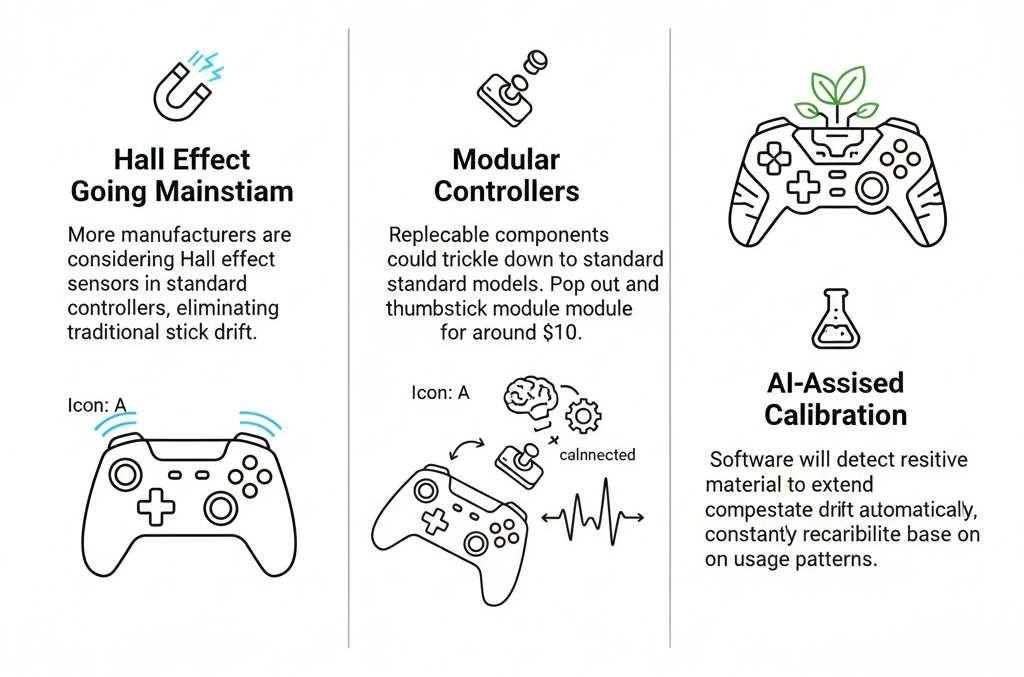
Hall Effect Going Mainstream
More manufacturers are considering Hall effect sensors. If major brands adopt this technology in standard controllers, stick drift could become a thing of the past.
Modular Controllers
The trend toward replaceable components in premium controllers might trickle down to standard models. Being able to pop out a thumbstick module and replace it for $10 would change everything.
Better Materials
Research into more durable resistive materials could extend potentiometer life significantly. Some industrial potentiometers last for decades; that technology needs to become cost-effective for game controllers.
AI-Assisted Calibration
Future controllers might use software to detect and compensate for drift automatically, constantly recalibrating based on usage patterns.
Final Thoughts
Stick drift is frustrating because it feels like your Controller is dying before it should. And honestly, in many cases, it is. Controllers wear out faster than they need to because manufacturers choose cheaper components to hit lower price points.
But understanding why drift happens and what you can do about it gives you options. Sometimes a simple cleaning fixes it. Sometimes you need to open up the Controller and replace parts. And sometimes the most brilliant move is investing in a better controller that won’t drift in the first place.
I’ve gone through more controllers than I care to admit. The lessons I’ve learned:
Keep your controllers clean. It really does help.
Don’t ignore minor drift, hoping it’ll go away. It won’t. Address it early.
If you game a lot, premium controllers or Hall effect alternatives are worth the extra cost.
Learn basic repair skills. Being able to swap out thumbstick modules or clean potentiometers saves money over time.
Most importantly, know that stick drift isn’t your fault. It’s not because you’re too rough on your Controller or playing wrong. It’s a design limitation of the technology most controllers use.
The good news? You now know how to fight back against it.

